Adding an OLT
How to add a Huawei OLT in Xelynx, from naming the device to firewall rules, access credentials, syncing, and VPN setup.
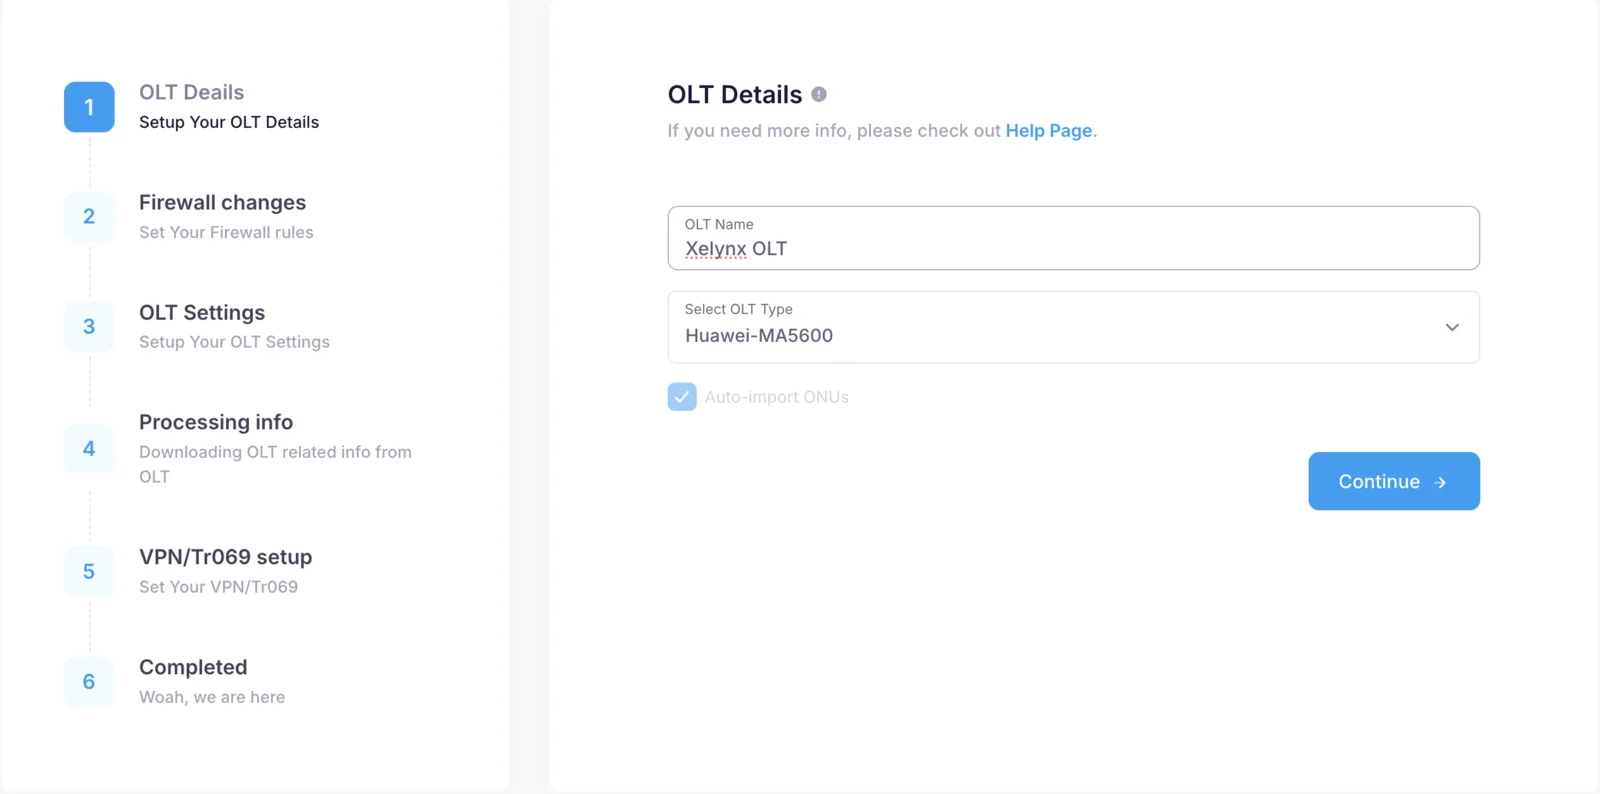
Step 1 — OLT name and model
In this step, you need to provide a name for your OLT and choose your Huawei OLT model.
OLT name: this can be any friendly name for your Huawei OLT. Your OLT name will be used throughout Xelynx when displaying any information about it.
OLT model: select your OLT model. The model is synced during the sync process, so even if you select it incorrectly here, it will be fixed automatically during sync.
Step 2 — Allow communication between Xelynx and your OLT
In this step, you are asked to allow access between Xelynx and your OLT.
Firewall rules: we provide a script for Mikrotik — just run these commands in the Mikrotik terminal to allow access. If you have a different router, make sure you allow access between your OLT and Xelynx.
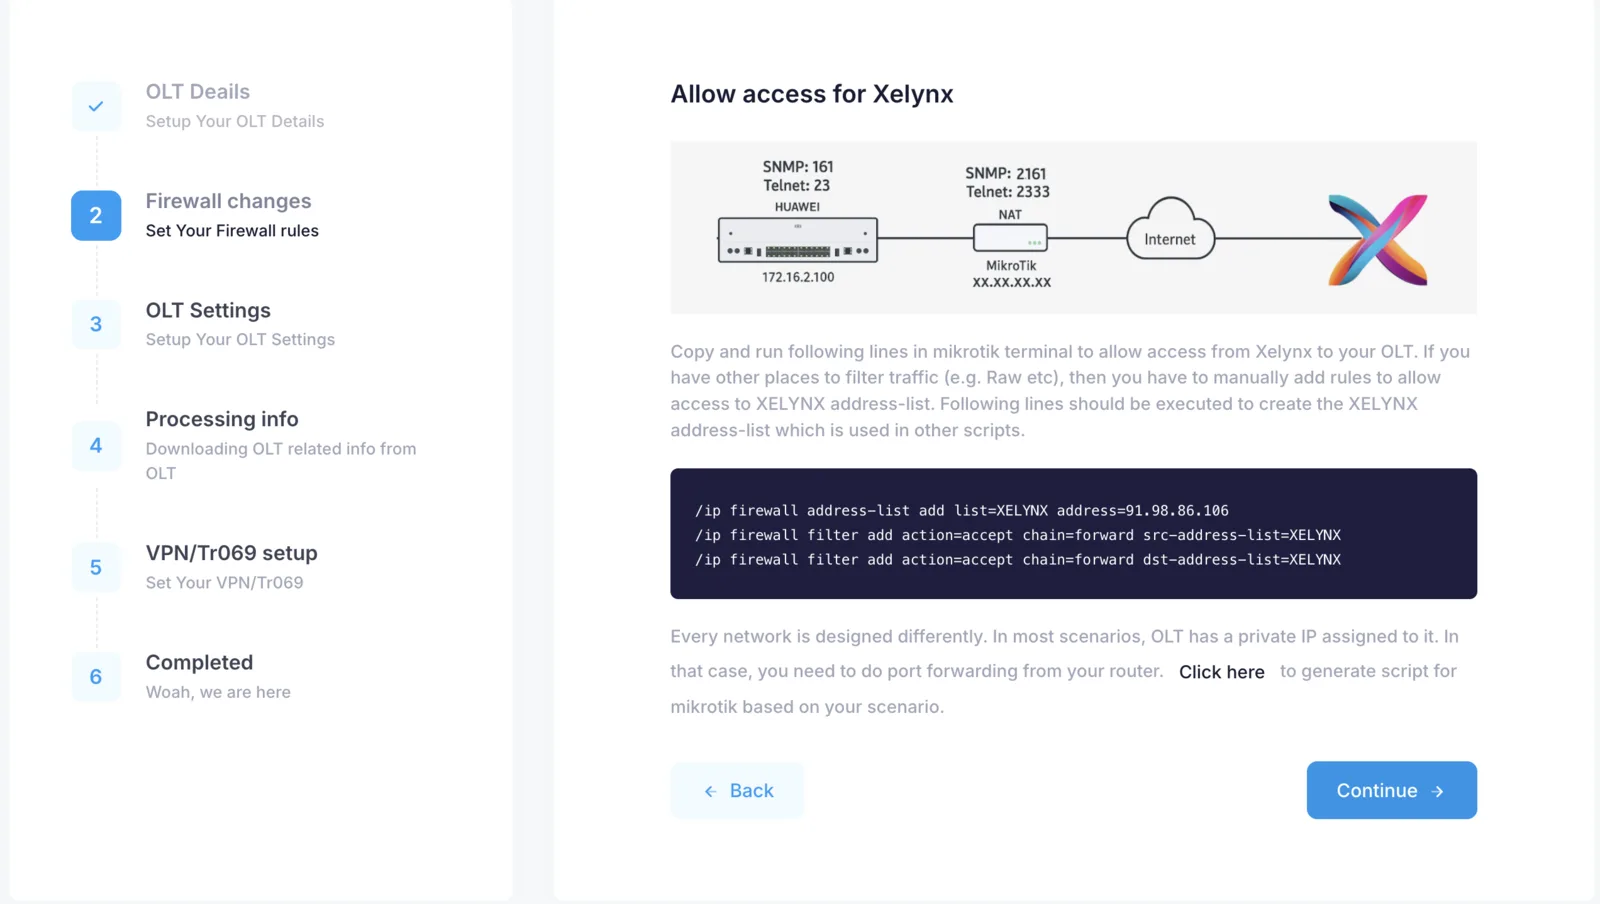
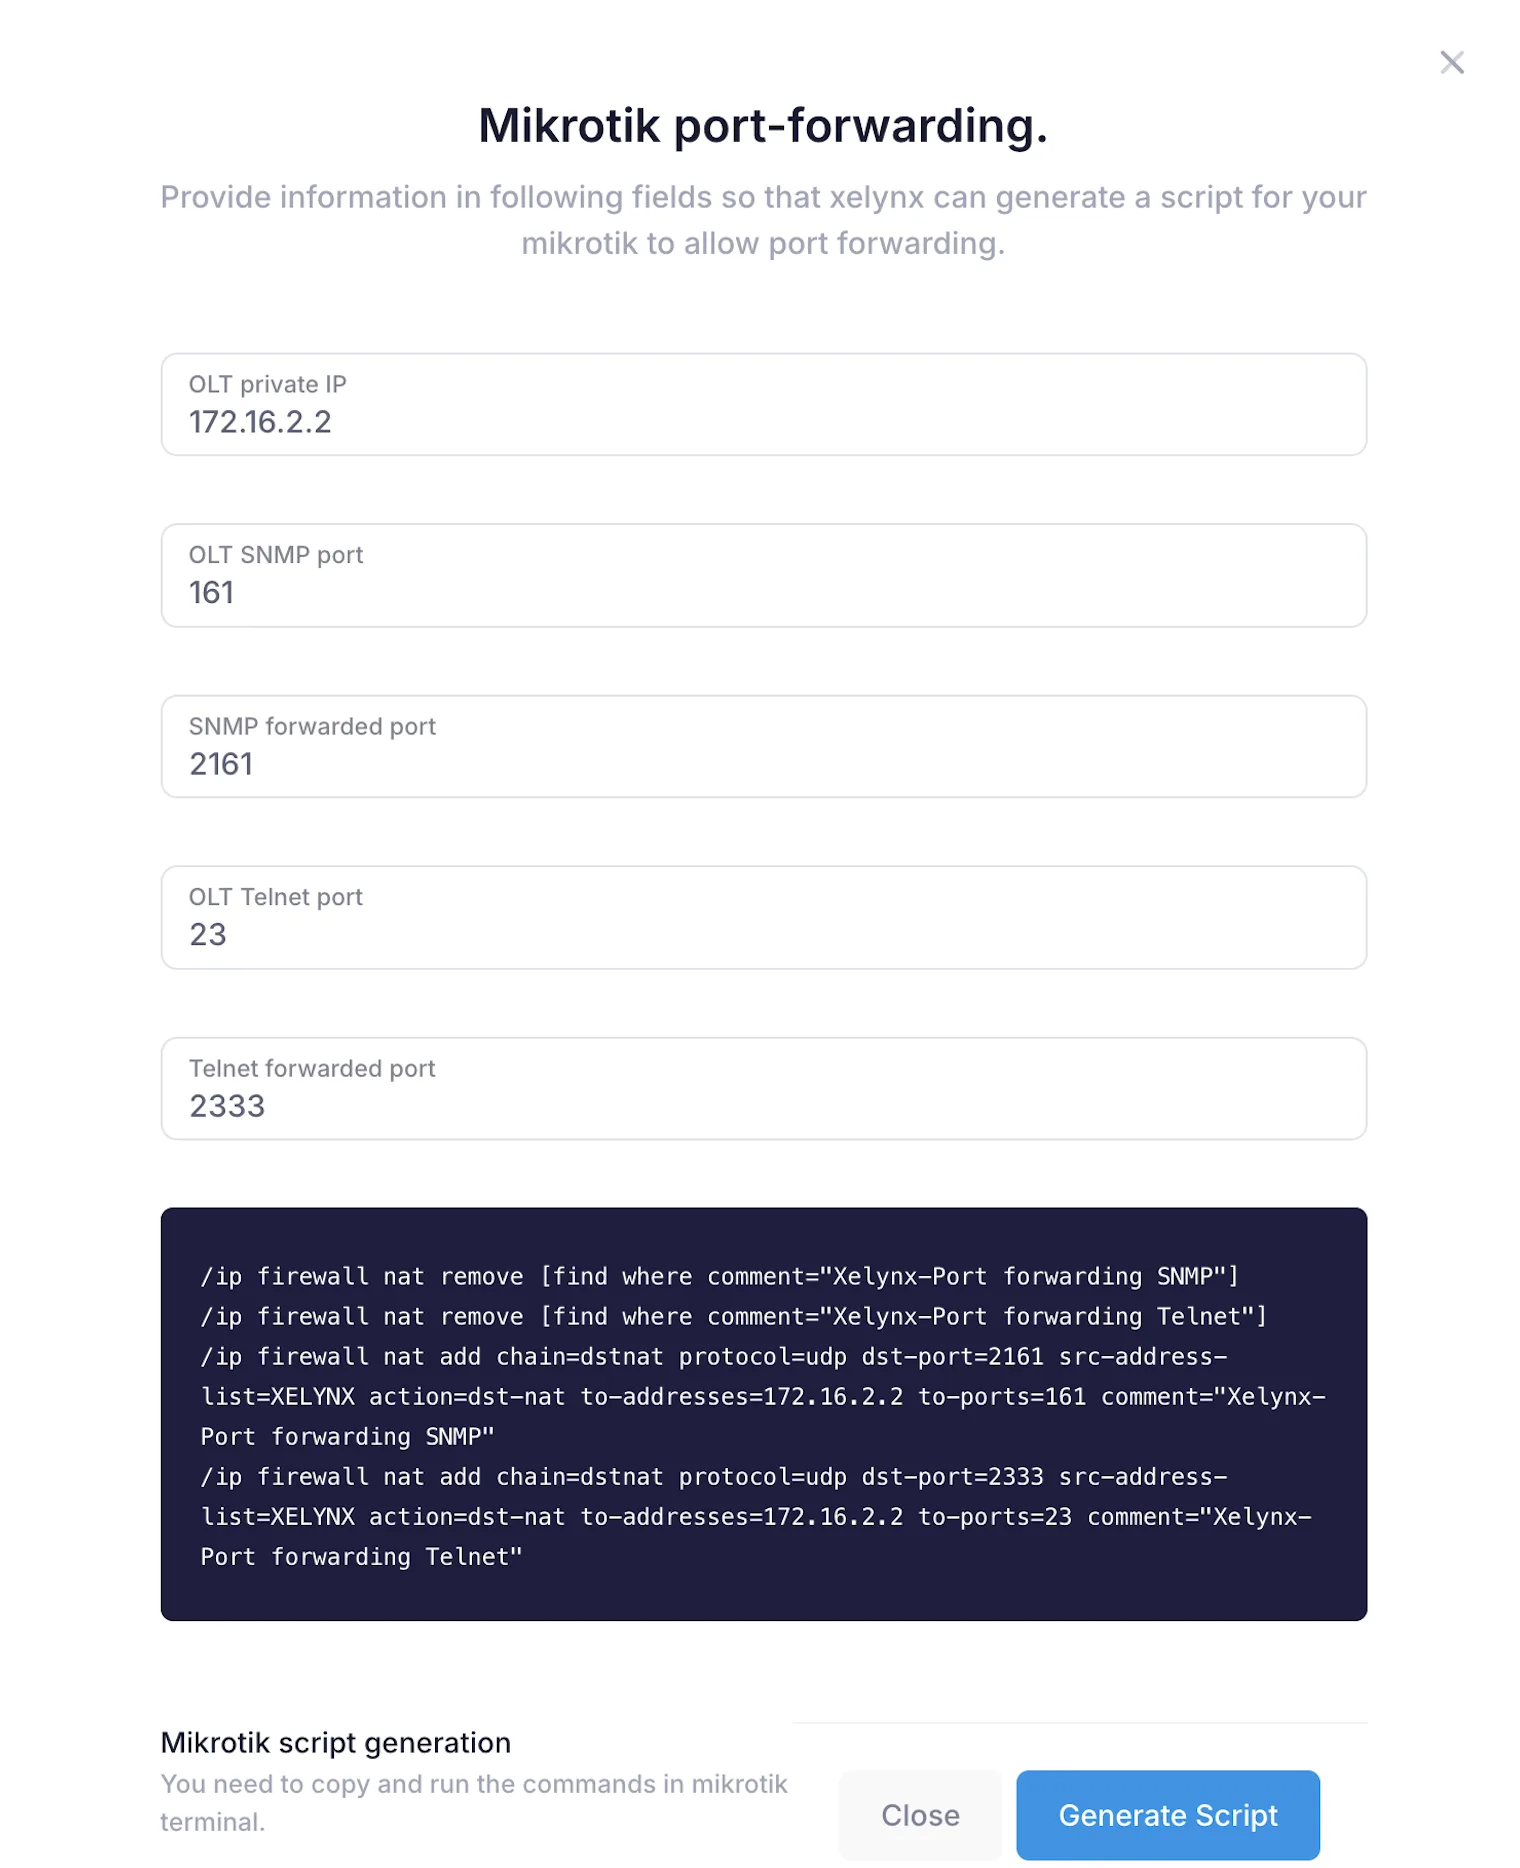
Port forwarding: in almost all cases, the OLT is given a private IP address. To allow access to the Telnet and SNMP ports, you will need to set up port forwarding (dst-nat). We provide a tool that generates a Mikrotik script — specify your details, and a script is generated that you just need to run in Mikrotik.
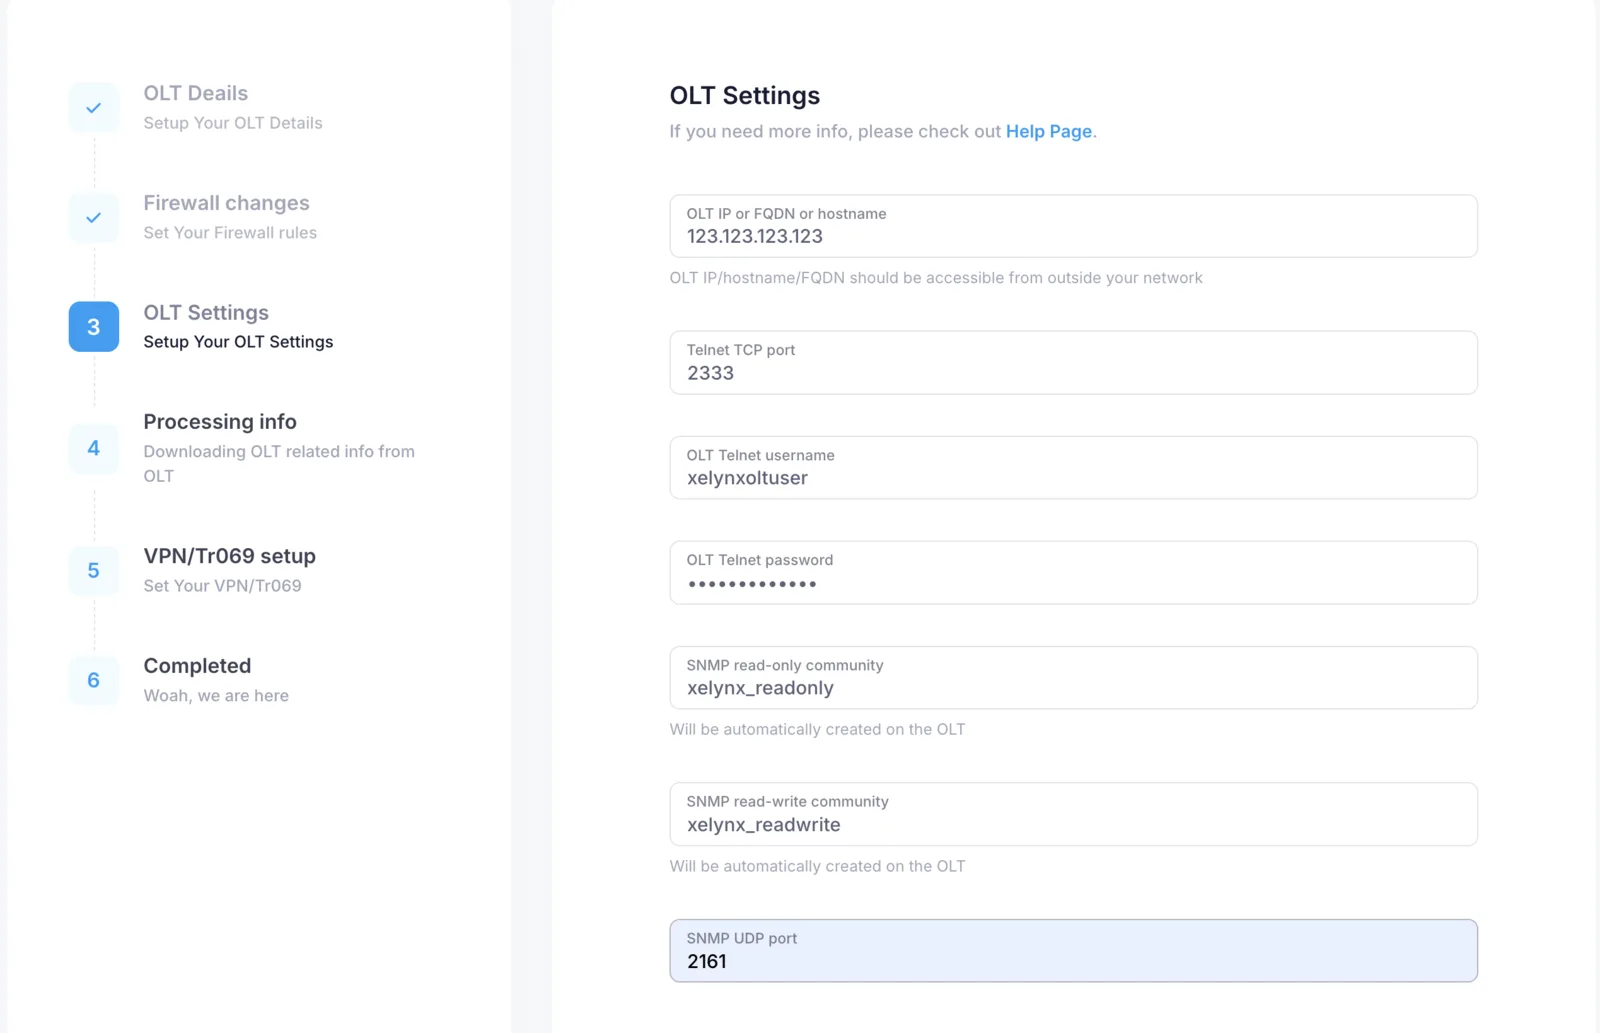
Step 3 — OLT access details
In this step, you need to provide the details Xelynx uses to access your OLT.
OLT IP: the public IP from where the OLT can be accessed. This is usually the IP of your router where you have done the port forwarding.
Telnet port: the Telnet port forwarded from your router to the OLT. If you ran the scripts generated in the previous step, you can just use the port mapped against the normal Telnet port 23.
OLT Telnet username: the OLT login username. If you have followed the initial setup guide, this should be xelynxoltuser. You can create any user on the OLT and use it here — Xelynx does not allow use of the root user.
OLT Telnet password: the OLT login password you used when creating the user.
OLT read-only community: Xelynx will create this SNMP read-only community. It can be any name, but you can leave it as it is.
OLT read-write community: Xelynx will create this SNMP read-write community. It can be any name, but you can leave it as it is.
OLT SNMP port: the SNMP UDP port forwarded from your router to the OLT. If you ran the scripts generated in the previous step, you can just use the port mapped against the normal SNMP port 161.
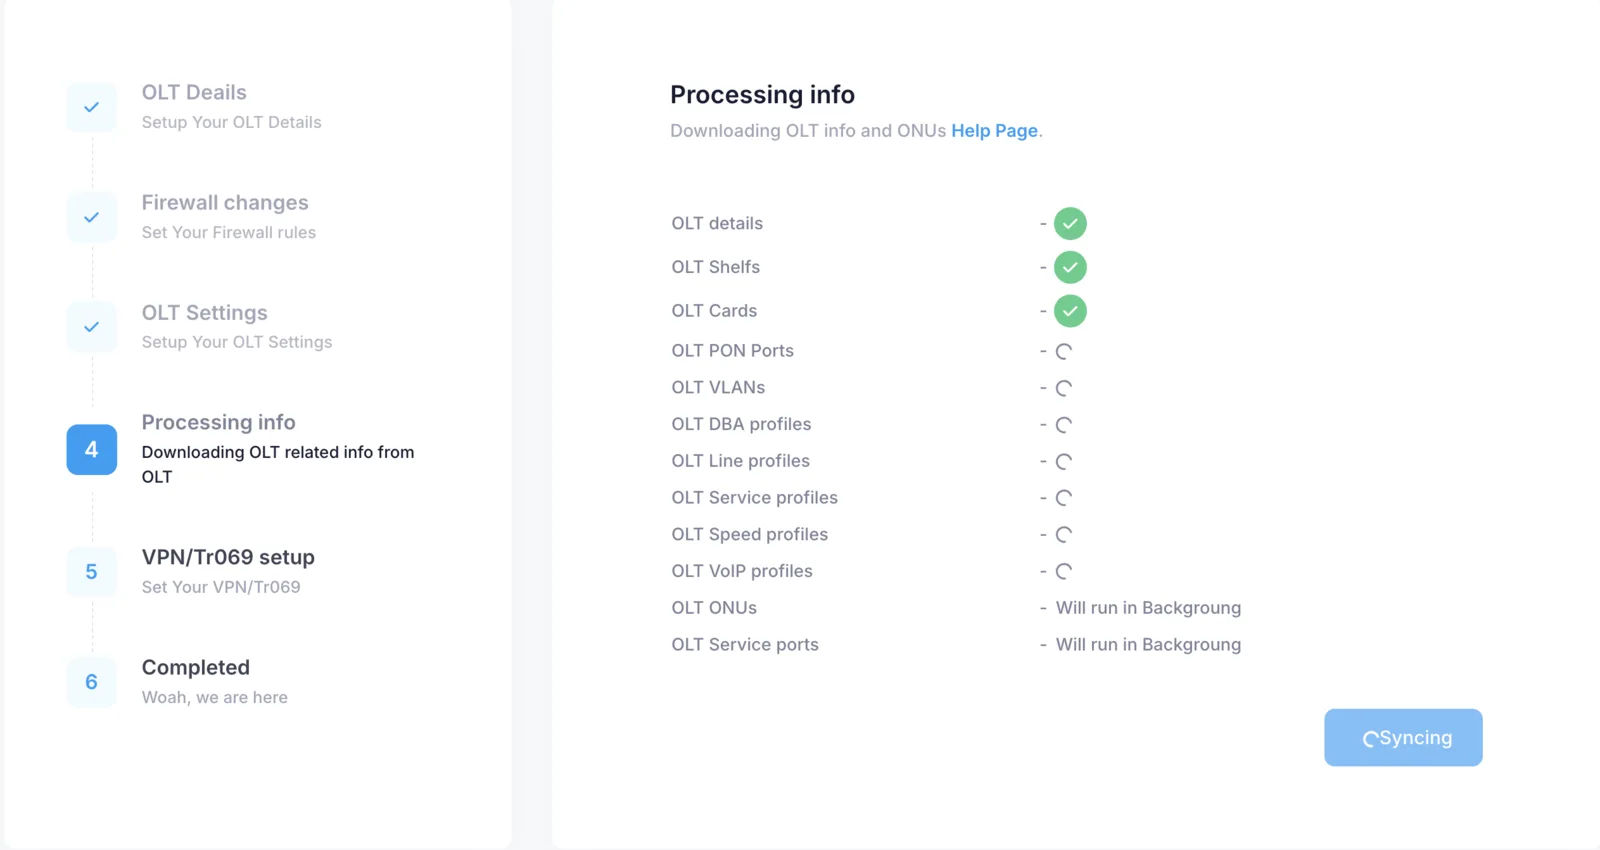
Step 4 — Xelynx syncs basic details from the OLT
In this step, Xelynx will get all the details from the OLT and sync Xelynx with your OLT.
Details are synced in groups, and the sync status is shown during this step.
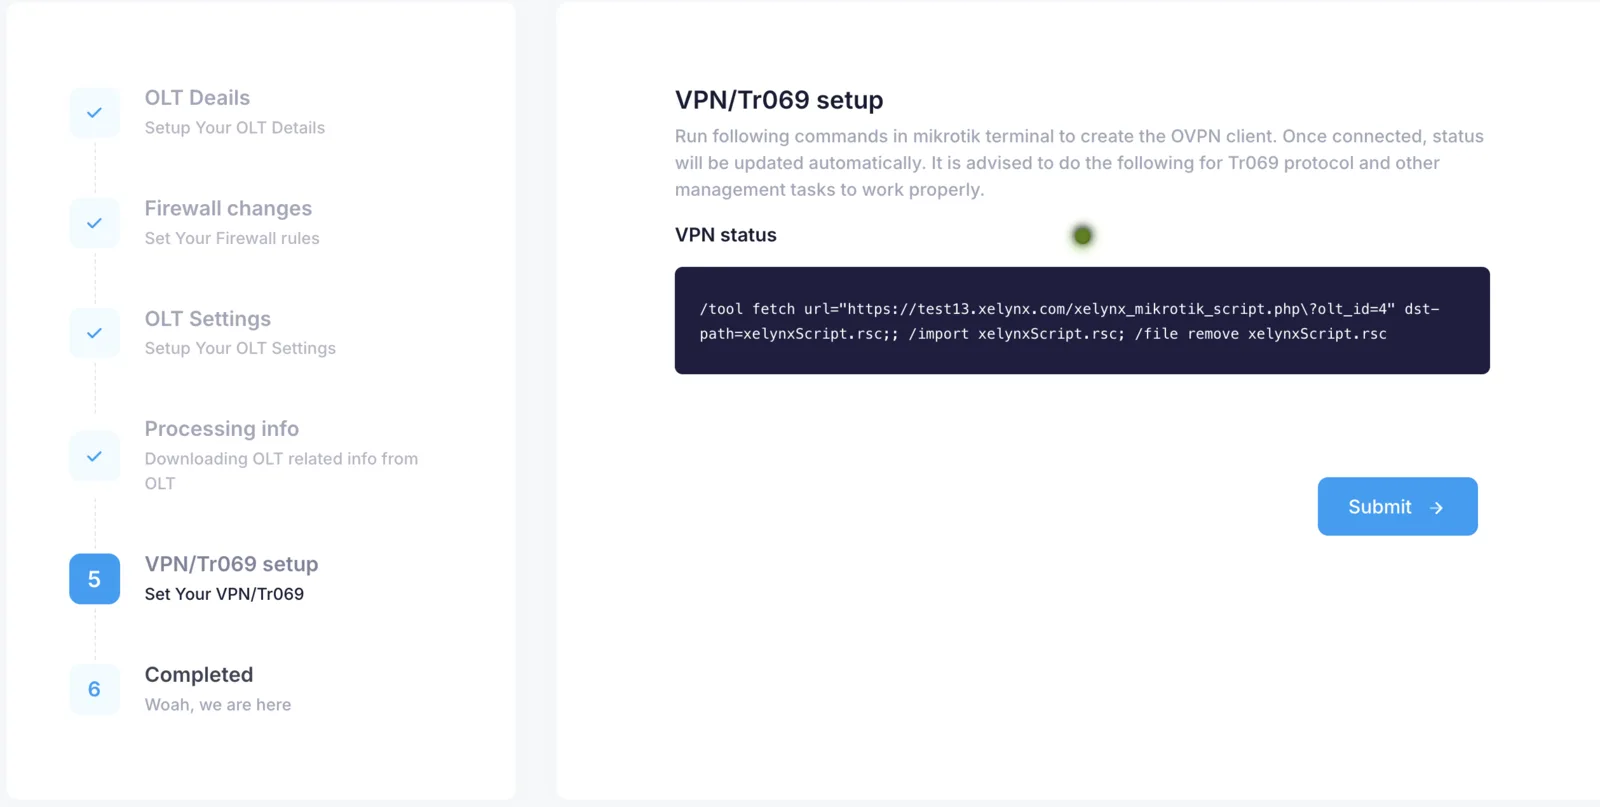
Step 5 — VPN setup
In this step you will create a VPN client on the router. A Mikrotik script is given — you just need to run it, and everything is taken care of. The VPN status will show whether it has connected after the script is run.
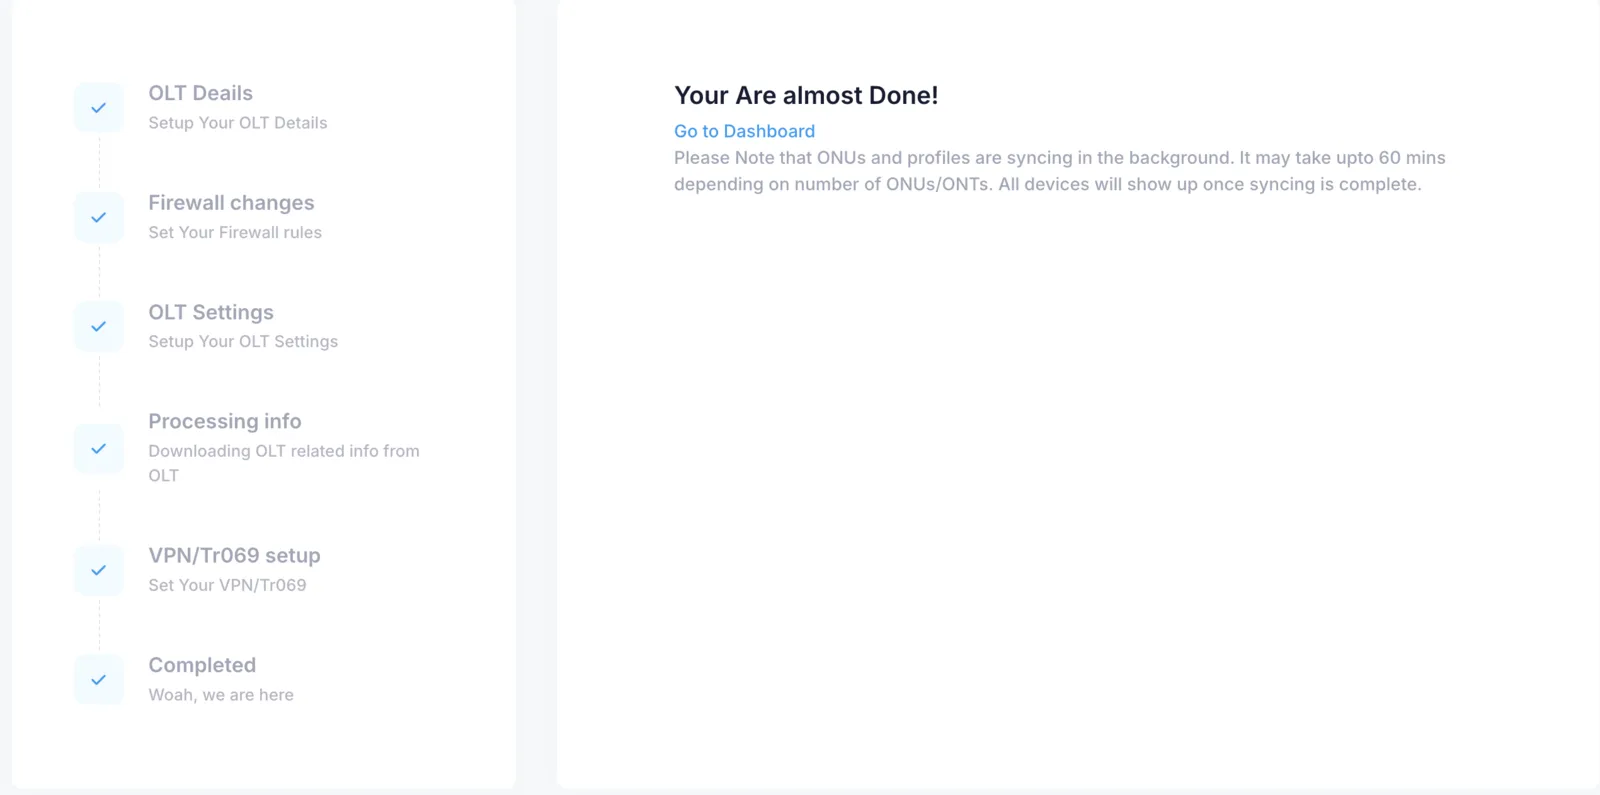
It's done
Devices will sync in the background, and a progress bar will be displayed at the bottom of each page.